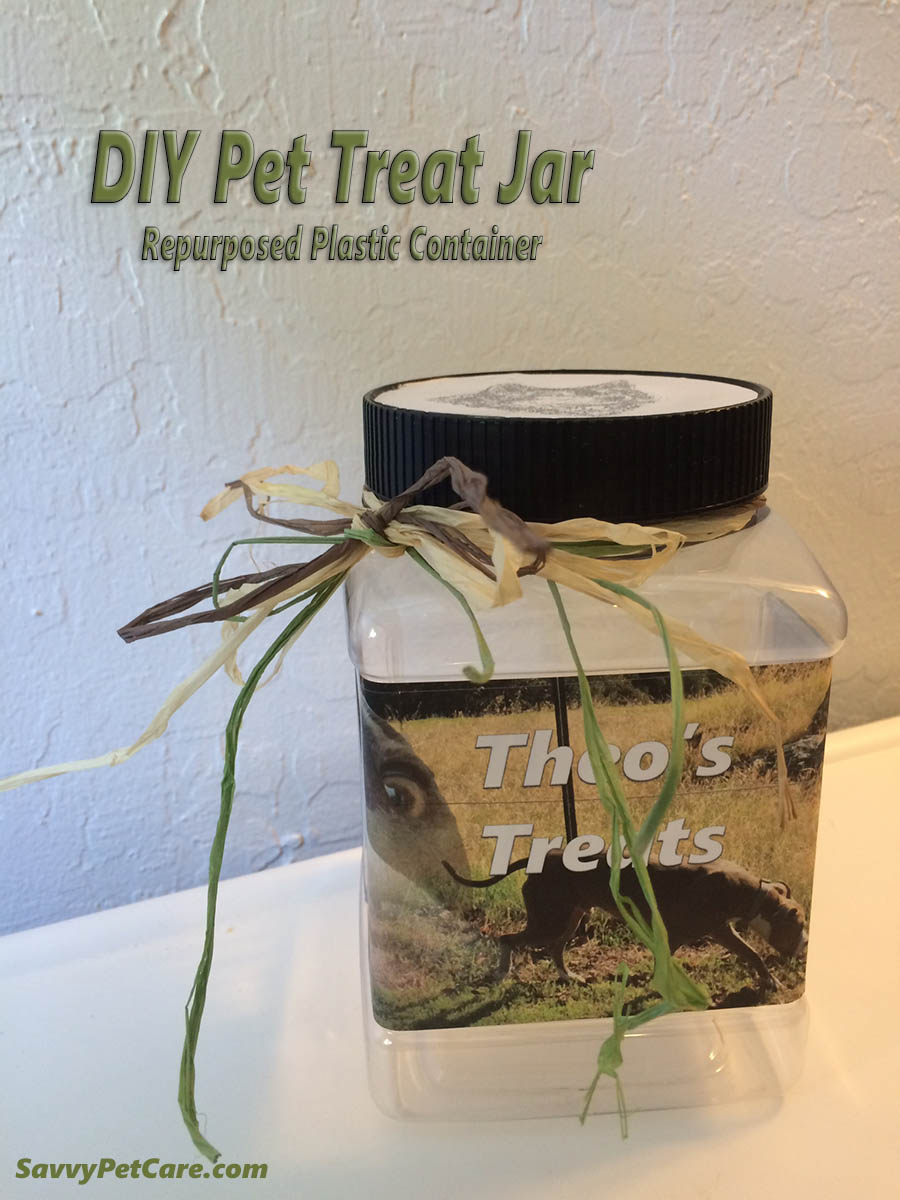
I try to be green whenever possible. I recycle, compost and try to reuse whatever I can. When I have an especially cool and useful-seeming plastic or glass container, it makes me crazy to put it in the recycle bin. So I have a collection of glass and plastic containers that I try to find ways to reuse. This DIY pet treat jar is a fun way to use them.
I like to give my clients a little something at this time of year and many of my saved containers are perfect for holding healthy, homemade pet treats. If you aren’t into making treats, you can always fill them with store bought treats for the pets in your world.
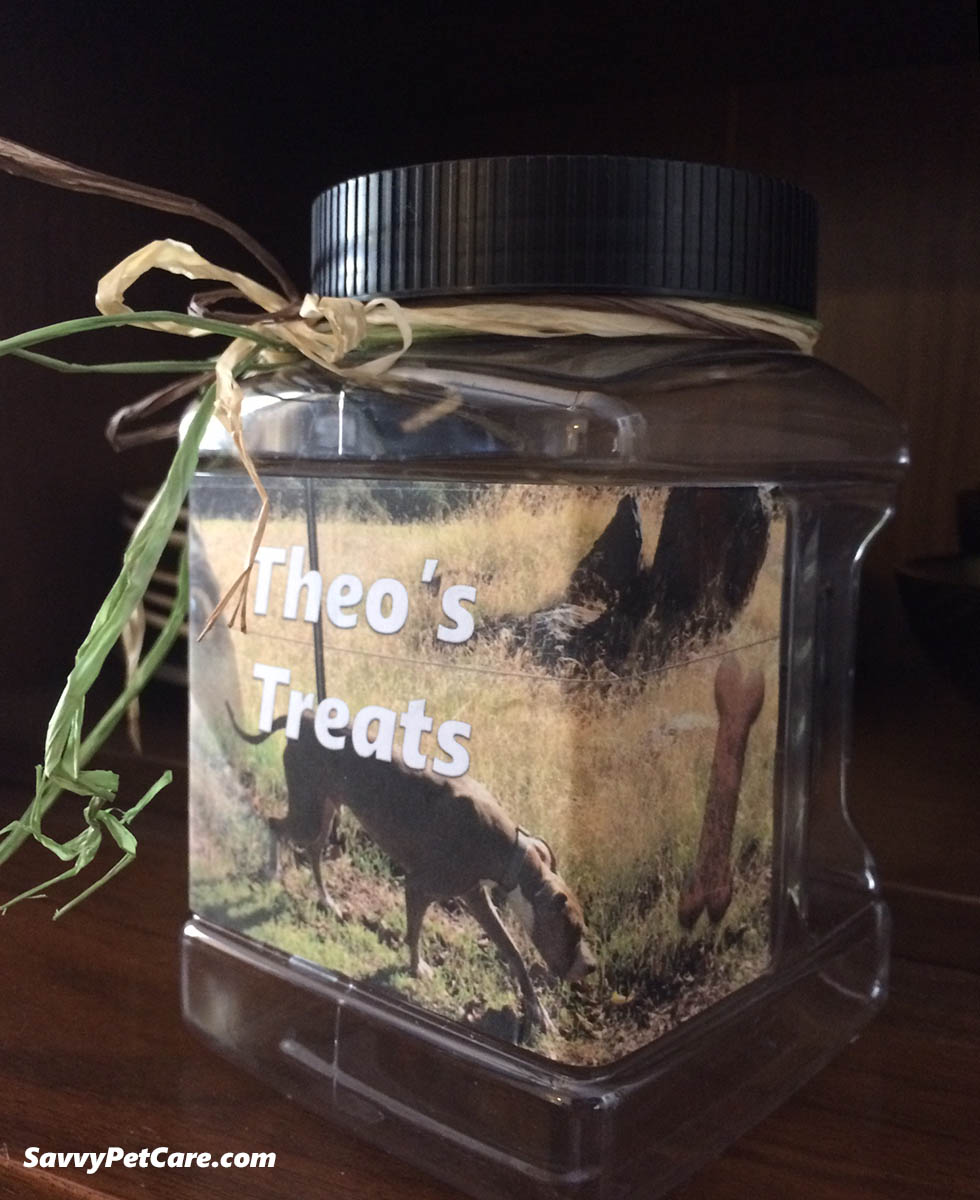
This square plastic container is one of my favorites. The ones I have came from Costco with shredded cheese in them. I use them to hold things like partial bags of baking chips, small amounts of flour, etc. They are also a good size for treats for a medium to large dog or cat treats for a multiple cat household.
DIY Pet Treat Jar Instructions
1. Remove the label from the container by running it under hot water for a few minutes then gently pulling it off. If you are going to cover the entire area with another label like in this project, you don’t even need to worry about getting the residual glue off. If you are going to decorate in another manner, you can get the glue off by rubbing it with cooking oil. It may take a little while, but it should all come off. Wash and dry your container.
2. Measure the area for your label. This container’s label is 7½ inches by 3¼ inches. I created a document in Photoshop with those dimensions. I always take a lot of pictures of my clients’ pets so I had plenty of photos to choose from. I laid out the design and added the text. If you are artsy, you can simply draw your design on the label which would probably be even more appreciated by the human recipient. I’m not an artist so I stick with Photoshop!
3. I printed out a test on regular paper and cut it out to see how the placement worked. I made a few adjustment to the layout and printed on a full sheet of label paper.
4. I used a rotary cutter to cut it out so the edges would be nice and smooth but scissors will work just as well.
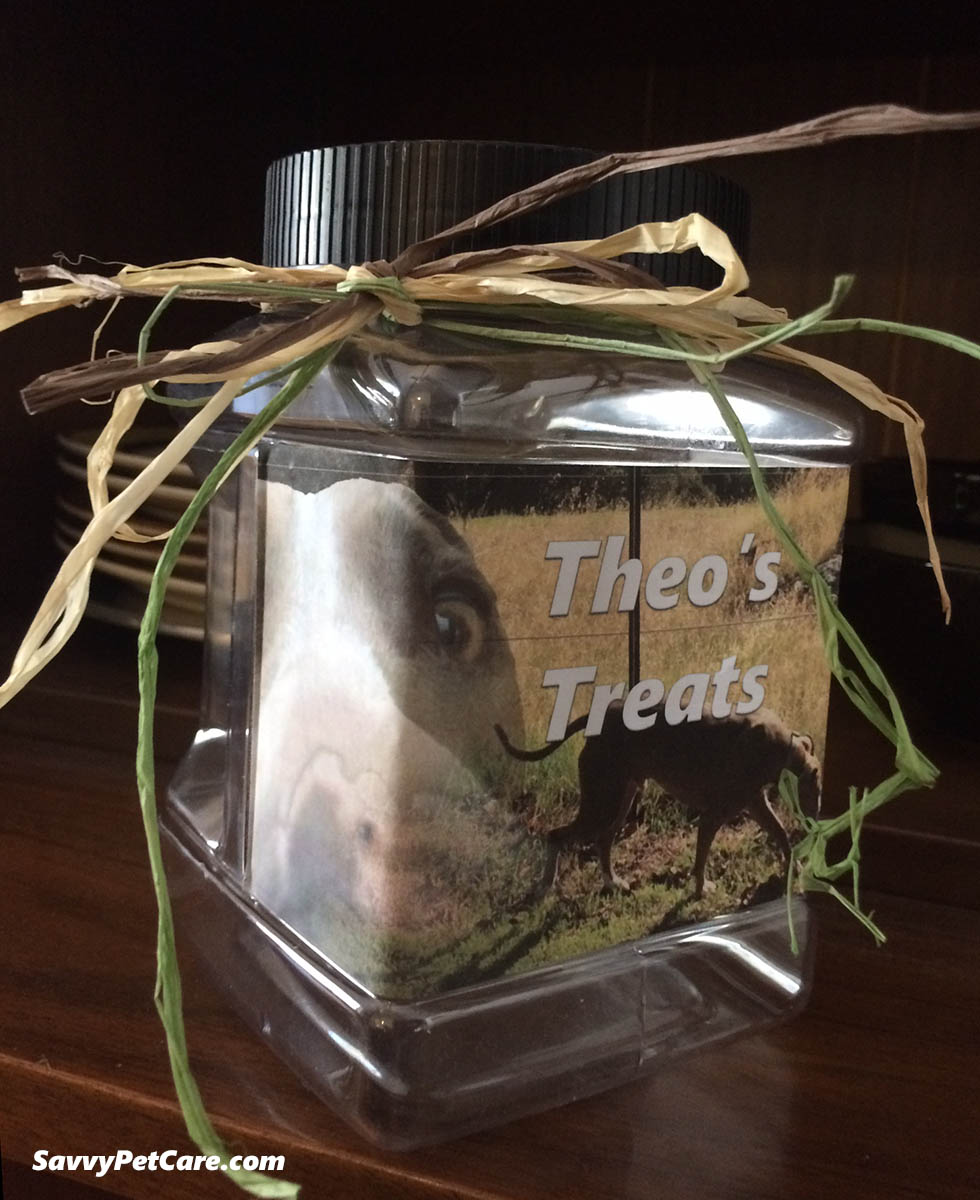
5. Carefully place the label and smooth out any air bubbles.
6. The lid also has a label that you can leave on if you are going to cover it up or remove as above if you are going to embellish the lid in some other manner. I cut out a circle the size of the lid and used a rubber stamp and embossing powder to decorate it.
7. You can continue embellishing with raffia, ribbon, stickers, tags or whatever else strikes your fancy. A gift tag will be my finishing touch on this DIY pet treat jar once it is full of homemade treats.
Now I’m off to the kitchen to make those treats. Look for the recipe next time along with a roundup of my favorite treats on the internet.
I never even thought of giving these as gifts – what a fantastic idea! I have lots of friends with pets, and this would make a great gift for their pets.
What a cute idea! I love to find ways to repurpose things like this too. I have a few glass jugs that used have peach cider in them that I’m trying to figure out a use for. The opening in the top is too small for a treat jar, so I will have to come up with something else. I love this though! Will have to save a jar that would be good for this.


 I try to be green whenever possible. I recycle, compost and try to reuse whatever I can. When I have an especially cool and useful-seeming plastic or glass container, it makes me crazy to put it in the recycle bin. So I have a collection of glass and plastic containers that I try to find ways to reuse. This DIY pet treat jar is a fun way to use them.
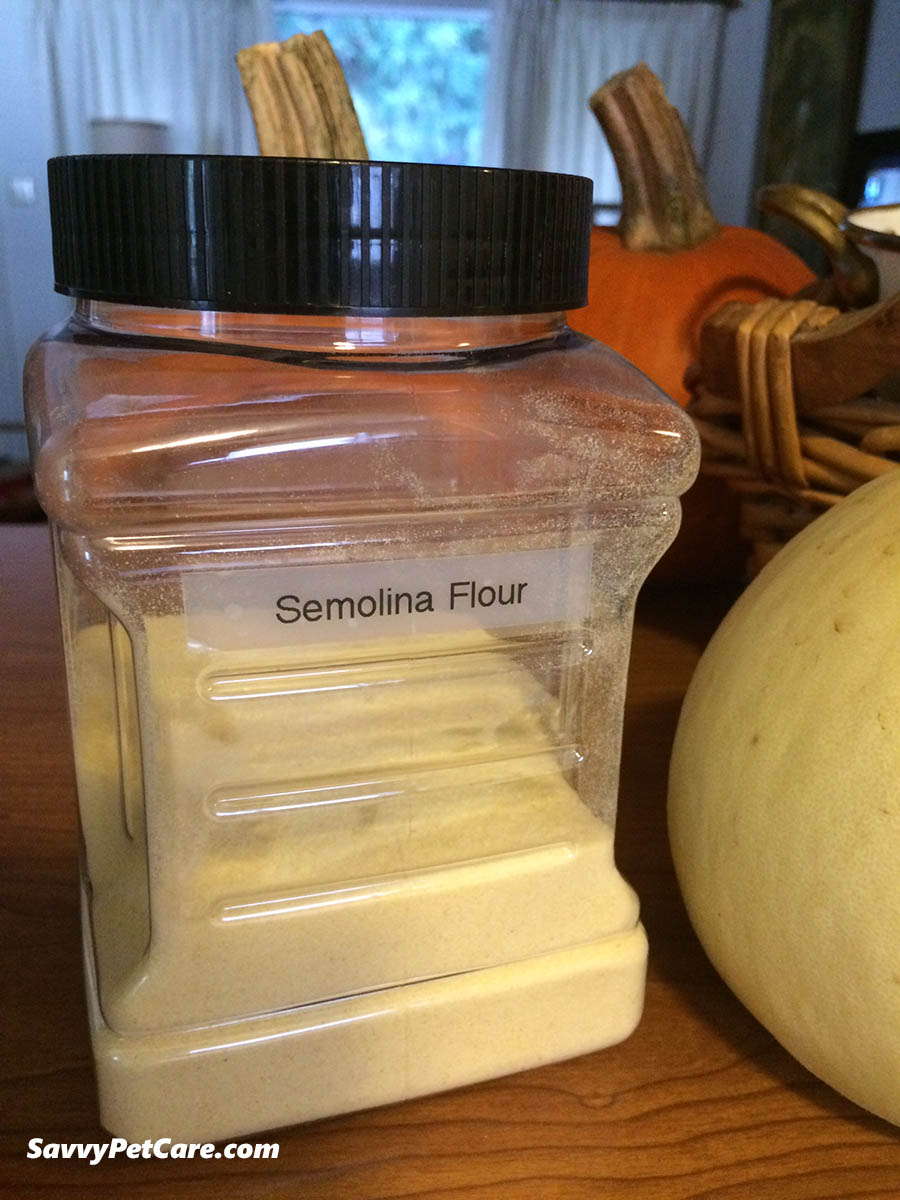 world.
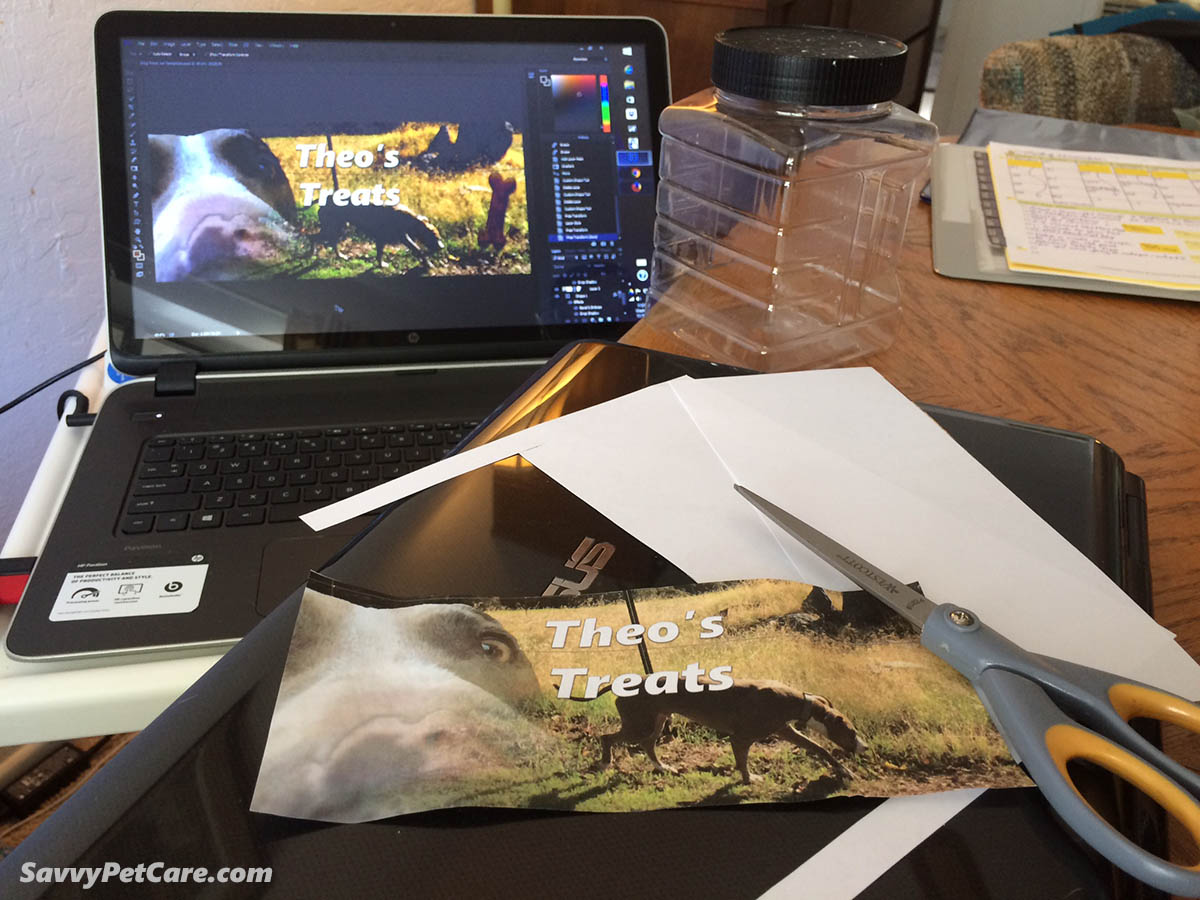


Pingback: Homemade Dog Treat Recipe Roundup - Savvy Pet Care
Pingback: Homemade Grain-free Dog Treats - Savvy Pet Care
I never even thought of giving these as gifts – what a fantastic idea! I have lots of friends with pets, and this would make a great gift for their pets.
Very cute DIY project! It came out great. I hate to throw away nice containers too. I may have to give this project a try!
This is such a great idea! Even Mommy could do this! Thanks for sharing.
This looks easy enough that Mom Paula could do it.
What a great idea! And it could make a great gift, too. 🙂
What a cute idea! I love to find ways to repurpose things like this too. I have a few glass jugs that used have peach cider in them that I’m trying to figure out a use for. The opening in the top is too small for a treat jar, so I will have to come up with something else. I love this though! Will have to save a jar that would be good for this.
Ava, this is a very creative idea. Being green is a huge plus too. looking forward to more ideas from you.